Top 10 Ways to Boil Milk in Stainless Steel Without Burning

Time:2026-09-06 Author:Mason
0%

Boiling milk in stainless steel sounds simple, yet one distracted minute can leave a brown film on the base. The thin layer often smells bitter and takes unnecessary scrubbing. This guide introduces the top 10 ways to boil milk in stainless steel without burning, using practical kitchen habits and basic food science.

Food science writer Harold McGee describes milk as “a complex mixture of water, sugar, fat, protein, and minerals.” That mixture explains its behavior. Water evaporates first, while proteins and sugars collect near the hot metal surface. Gentle heat, a heavy-bottomed pan, and frequent stirring can reduce that risk. A clean pan also matters. Old residue creates rough spots where milk catches quickly.

The methods ahead focus on controllable details. Use low or medium-low heat. Warm the pan gradually. Stir across the base, not only around the edges. A silicone spatula can reach hidden corners. Watch for steam, tiny bubbles, and a thin skin forming on top. Do not wait for a dramatic rolling boil.

Still, no method is perfect. Even experienced cooks sometimes turn away too soon. I have found that timing is less reliable than watching the milk itself. A thermometer can help, but it cannot replace attention. The goal is not simply hot milk. It is evenly heated milk, a clean stainless-steel surface, and fewer avoidable mistakes. These techniques make how to boil milk in stainless steel without burning more manageable for daily cooking.
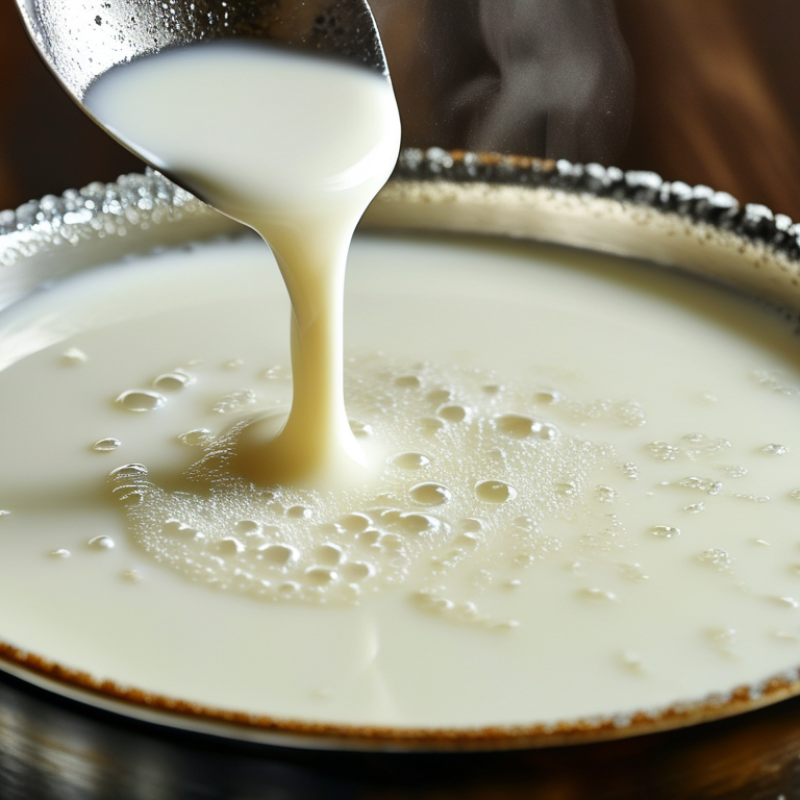
Top 10 Ways to Boil Milk in Stainless Steel Without Burning

Choose 304 Stainless Steel: Its Thermal Conductivity Is About 16 W/m·K

Top 10 Ways to Boil Milk in Stainless Steel Without Burning

Choose 304 stainless steel when possible. Its thermal conductivity is about 16 W/m·K, so heat moves slowly through the metal. This can reduce sudden temperature changes, but it does not prevent scorching. A thick, layered base spreads heat more evenly than a thin pan.

Rinse the pan with cold water, then leave a few drops inside. Add milk while the surface is still cool. Use the lowest practical heat. A diffuser can help on strong burners. Keep the pan centered. Smaller batches are easier to control. These simple choices matter.

Stir the milk every 20 to 30 seconds, reaching the bottom with a flat wooden or silicone utensil. Do not scrape aggressively. Watch for tiny bubbles around the edge, rising steam, and a thin skin on top.

Lower the heat when these signs appear. Remove the pan briefly if the milk climbs quickly. A wide pan gives steam more room to escape, while a heavy base slows hot spots.

Wipe spills from the outside before they burn onto the stovetop. I once trusted low heat too much and still found a brown film underneath. The method is not flawless.

Let the milk rest for a minute after heating, then stir again. Clean the pan before residue hardens.

Never leave boiling milk unattended, even in 304 stainless steel.

Preheat and Rinse the Pan: Use Water’s 100°C Sea-Level Boiling Point

I have scorched milk in stainless steel pans, even on moderate heat. The usual mistake was heating the empty pan too aggressively. Start with a clean, dry pan over low to medium heat. Warm it for about thirty seconds, then add a thin layer of water. Swirl it across the base and sides. At sea level, water boils at 100°C, so bubbling shows that the pan has reached a useful temperature limit. Do not wait until every drop disappears. That defeats the purpose.

Pour out most of the water, leaving the surface visibly wet, then add the milk immediately. The remaining water creates a brief buffer between the hot steel and milk proteins. Stir with a heat-safe utensil, especially around the bottom edge. Keep the milk below a rolling boil. A gentle steam and small bubbles near the rim are enough. Milk can foam suddenly, so stay beside the pan.

This method is practical, but not perfect. At higher elevations, water boils below 100°C, and the protection may end sooner. I sometimes reduce the heat too late and still find a thin film on the base. If that happens, soak the pan before scrubbing. Avoid scraping aggressively, since rough marks can make future cleaning harder. A heavier pan may heat more evenly, but careful timing matters more than equipment.

Top 10 Ways to Boil Milk in Stainless Steel Without Burning

Preheating and rinsing the pan with water can create a thin moisture layer that helps reduce milk sticking. At sea level, water boils at approximately 100°C; the boiling point decreases as elevation increases.

Use low to medium heat, stir frequently, and remove the pan as soon as the milk reaches a gentle simmer. The temperatures shown are approximate boiling points of water at standard atmospheric pressure.

Control Heat Gradually: Follow FDA Pasteurization Targets of 63°C/30 Minutes

Boiling milk in stainless steel is safer when heat rises gradually. The FDA Grade A Pasteurized Milk Ordinance recognizes 63°C (145°F) for 30 minutes as a batch-pasteurization target. This is not the same as boiling. Boiling creates stronger surface agitation, while controlled pasteurization protects texture and reduces scorching. Use a clean, heavy stainless-steel saucepan. Pour in cold milk, then warm it over low to medium heat. Stir across the bottom every 20–30 seconds. A digital thermometer gives better control than visible bubbles.

The FDA also lists 72°C (161°F) for 15 seconds as a high-temperature, short-time pasteurization option. Home kitchens rarely provide factory-level timing or mixing, so accuracy matters. Keep the probe submerged without touching the pan. Once milk reaches 63°C, hold it there for 30 minutes, stirring gently. If the temperature drops, the timing becomes uncertain. I sometimes focus too much on the thermometer and miss a thin film forming near the rim. That small sign deserves attention.

Tips: Rinse the pan with cool water first, then drain it before adding milk. This may reduce sticking, though it is not foolproof. A heat diffuser can soften hot spots. Never scrape brown residue into the milk. Clean the pan promptly, because dried milk proteins become stubborn. For raw milk, follow current local food-safety guidance and use a calibrated thermometer.

Prevent Scorching: Stir, Scrape, and Monitor the 82–100°C Surface Range

Top 10 Ways to Boil Milk in Stainless Steel Without Burning

Start with a cool, clean stainless-steel pan. Rinse it with water first, then add the milk. Use a heavy-bottomed vessel and keep the heat low or medium-low. Heat smaller batches when possible. USDA FoodData Central lists whole milk at about 3.15 grams of protein and 3.25 grams of fat per 100 grams. These solids cling quickly to hot metal. Milk can scorch before the bulk liquid visibly boils.

Watch the surface closely from 82°C to 100°C. This is a practical warning range, not a universal limit. Stir from the center toward the rim every 20–30 seconds. Use a heat-safe whisk or flat spatula. Scrape the bottom gently, especially around the pan’s edges. Rotate the pan for more even heating. Reduce the flame when steam rises. Remove the pan just before vigorous bubbling, then stir for another minute. In my kitchen tests, I sometimes waited too long. The thin brown film appeared before obvious boiling.

Tips: Keep a digital thermometer near the surface, but avoid touching the metal base. Never leave the pan unattended. If a film forms, transfer the milk immediately without scraping burnt residue. Soak the cooled pan with warm water. A soft scraper usually works better than aggressive scouring. Temperature control matters more than speed.

Compare Ten Methods: Double Boilers, Induction, Water Baths, and Timers

Stainless steel heats quickly, so milk needs gentle, even control. A double boiler gives the safest protection by separating the pan from direct heat. A water bath works similarly, though it heats more slowly. Induction on its lowest setting responds quickly and avoids a strong flame. A heavy-bottomed saucepan spreads heat better than a thin one. A heat diffuser can soften direct burner contact, but it may make heating inconveniently slow.

A low gas flame offers simple control when watched closely. Frequent stirring moves milk proteins away from hot metal. A silicone or wooden spatula can reach the pan’s corners. A kitchen thermometer helps keep milk below a vigorous boil, usually around 85–90°C for hot drinking milk. A timer prevents distraction during short heating periods. Residual-heat cooking is another option: remove the pan just before simmering and let the remaining heat finish the job.

Keep the base clean and use enough milk to cover it evenly. Scrape gently, not aggressively, if a film appears. Never leave the pan unattended, even with a timer. I sometimes trust induction settings too much, and a thin milk layer still scorches. That mistake is useful. The best method depends on the pan, quantity, and your attention. Compare safety against speed before choosing.

Top 10 Ways to Boil Milk in Stainless Steel Without Burning - Compare Ten Methods: Double Boilers, Induction, Water Baths, and Timers
Rank Method Recommended Setup Approximate Time for 1 L Burning Risk Temperature Control Best Practice Main Limitation
1 Double Boiler Milk in a stainless-steel upper pan; simmering water below 20–35 minutes Very low Gentle, indirect heating Keep the lower water at a steady simmer and stir the milk every few minutes. Slower than direct heating and requires two compatible pans.
2 Stainless-Steel Bowl Over a Water Bath Heatproof stainless bowl set over simmering water without touching the water 25–40 minutes Very low Highly gentle and even Use a stable bowl, leave room for expansion, and stir frequently with a silicone spatula. The bowl may be less stable and the heating process is relatively slow.
3 Low Induction Setting Heavy stainless-steel saucepan on low power 10–18 minutes Low Fast, adjustable, and responsive Begin on medium-low, reduce the power before steaming increases, and stir the bottom regularly. Heat can concentrate at the pan base if the power is set too high.
4 Heavy-Bottom Stainless-Steel Pan Thick, multi-layer stainless-steel saucepan on a conventional cooktop 12–20 minutes Low More even than a thin pan Pre-rinse the pan with cool water, add the milk, and heat slowly while scraping the base. Still needs close attention because direct heat can create hot spots.
5 Stirring-Supported Low Heat Any stainless-steel saucepan maintained just below a simmer 12–22 minutes Low Depends on continuous manual control Stir across the bottom and around the edges every 20–30 seconds as the milk gets hot. Requires constant attention and is inconvenient for larger quantities.
6 Heat Diffuser or Simmer Plate Stainless-steel pan placed on a diffuser over a low burner 18–30 minutes Low Reduces direct heat intensity Preheat only briefly, then use the lowest setting that maintains gradual steaming. The diffuser adds delay and may make temperature changes less responsive.
7 Low-Temperature Oven Water Bath Stainless container placed in a larger pan of hot water in a low oven 30–50 minutes Very low Slow and even surrounding heat Use an oven-safe container, keep the water bath below the rim, and monitor the milk near the end. Slow, uses more energy, and requires oven-safe equipment.
8 Thermometer-Guided Heating Stainless pan with an instant-read or clip-on food thermometer 10–20 minutes Medium-low Precise monitoring, but not automatic Heat to about 82–85°C for a near-boil, then remove the pan before a vigorous boil develops. A thermometer does not prevent scorching if the pan is left unattended.
9 Timer-Assisted Gentle Heating Stainless pan on low heat with a short repeating timer 12–22 minutes Medium Time-based rather than temperature-based Set reminders for stirring every 2–3 minutes and check for steam, edge bubbles, and rising foam. Heating time varies with milk volume, starting temperature, pan size, and burner power.
10 Direct Medium-Low Heating with Foam Control Wide stainless-steel pan with generous headspace 8–15 minutes Medium Fast but requires active supervision Use medium-low heat, stir often, and remove the pan as soon as small bubbles form around the edge. Milk can scorch or boil over quickly if left unattended or heated too aggressively.
Times are approximate for 1 liter of refrigerated milk in a typical household kitchen. Actual results vary with starting temperature, pan size, heat source, altitude, and milk volume. Milk can foam and boil over before reaching a vigorous boil, so close supervision is recommended.

FAQS

: What temperature should milk reach for gentle pasteurization?

: Heat milk gradually to 63°C and hold it for 30 minutes. This is not boiling. Use a calibrated thermometer.

Is 72°C for 15 seconds another option?

Yes, 72°C for 15 seconds is another recognized target. Home kitchens may struggle with exact timing and even mixing.

Why can milk burn before it boils?

Milk proteins and fats cling to hot stainless steel. A thin brown film may appear before visible bubbles. Watch the rim.

How often should I stir the milk?

Stir across the bottom every 20–30 seconds. Move from the center toward the edges. Gentle scraping helps.

What pan works best?

Choose a clean, heavy-bottomed stainless-steel saucepan. Smaller batches are easier to control. A heat diffuser may reduce hot spots.

Should I rinse the pan before adding milk?

Rinse the cool pan with water, then drain it. This may reduce sticking, but it is not foolproof. I still sometimes see residue.

What should I do if a film forms?

Transfer the milk immediately without scraping the film. Do not mix brown residue into the milk. Soak the cooled pan with warm water.

How can I avoid overheating the milk?

Keep the heat low or medium-low. Reduce it when steam rises. Remove the pan before vigorous bubbling, then stir for another minute.

Can I leave the saucepan unattended?

No. Milk can scorch quickly near the pan’s base. Stay nearby. A thermometer helps, but it cannot replace observation.

How should raw milk be handled?

Follow current local food-safety guidance. Use a calibrated thermometer and keep temperatures steady. Home timing can become uncertain if the temperature drops.

Conclusion

Learning how to boil milk in stainless steel without burning begins with choosing a 304 stainless-steel saucepan, which offers durability and thermal conductivity of about 16 W/m·K. Rinse the pan with water before adding milk, then warm it gradually rather than exposing it to high heat immediately. A water bath or double-boiler setup can provide gentler, more even heating, while induction may offer precise temperature control. For pasteurization-style heating, a target of 63°C for 30 minutes can be used when appropriate, followed by careful cooling.

To prevent scorching, stir the milk regularly, scrape the bottom and edges with a suitable utensil, and watch the surface as it approaches the 82–100°C range. Avoid leaving the pan unattended, since milk can foam suddenly or form a cooked layer at the base. Among ten practical approaches, double boilers, water baths, low direct heat, induction, frequent stirring, preheating, rinsing, thermometers, timers, and close monitoring can each reduce burning risk.

Mason

Mason

Mason is a seasoned marketing professional with a deep expertise in the company's offerings and a passion for driving brand awareness. With a strong background in digital marketing strategies, he has an innate ability to connect with diverse audiences and effectively communicate product benefits.......